

")
A Fresh Summer Start
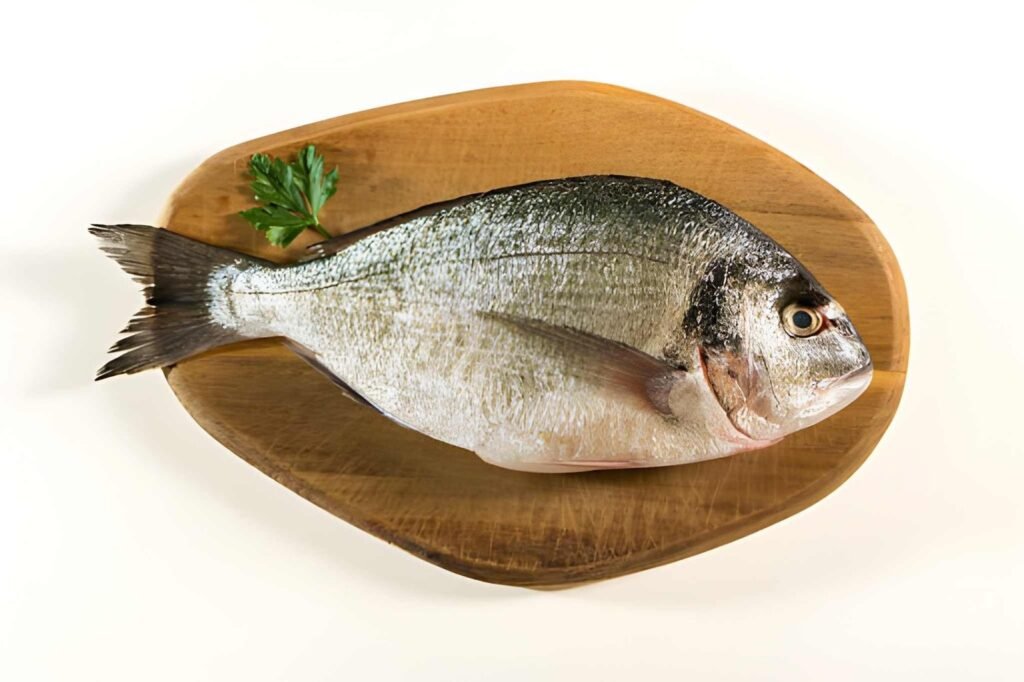
In summer heat, I crave simple, light, and delicious dishes. They don’t take a lot of effort and feel easy. This quick recipe uses four ingredients for grilled sea bream. It checks all the boxes when busy evenings start fast. For me, it is ideal for cooking the whole fish. It is one of the most favored selections.
Around the Mediterranean, cooks love its tasty, firm, white flesh. It has few bones, which helps me deal calmly. That part can make dinner feel super relaxed and inviting. I debone it gently, whether I serve it on a platter or not.
Sometimes we eat at the table with friends, just as you do. If you have never had bone-in bream, this is a good start.
The Many Names of Orata
In Italy, this fish is known as orata. Spanish cooks call it “dorada,” a name that sounds bright and warm. In France, it’s commonly referred to as “dorade” or “daurade royale.” ” A different name calls each term, yet the fish remains special.
Sea bream or gilt head bream both fit perfectly here. Those names keep referring to beauty, tradition, and taste. The clue is the gold shine across its face. A golden crescent rests between the eyes and cheeks.
That detail matters, on account of its royal look. From experience, it makes market selection much easier.
Smart Fish Counter Tips
I highly recommend asking the fishmonger for gutting and cleaning. That service is often included in the price already. Ask for the whole fish to be gutted and cleaned. Still, keep the scales on before the grill. They help protect the flesh from intense heat. From experience, that small step improves texture every time.
For substitutions, you can’t always find sea bream easily. Then Mediterranean sea bass, branzino, or red snapper work beautifully. These other options stay among my weeknight favorites, too. Each one handles high heat with steady, clean flavor.
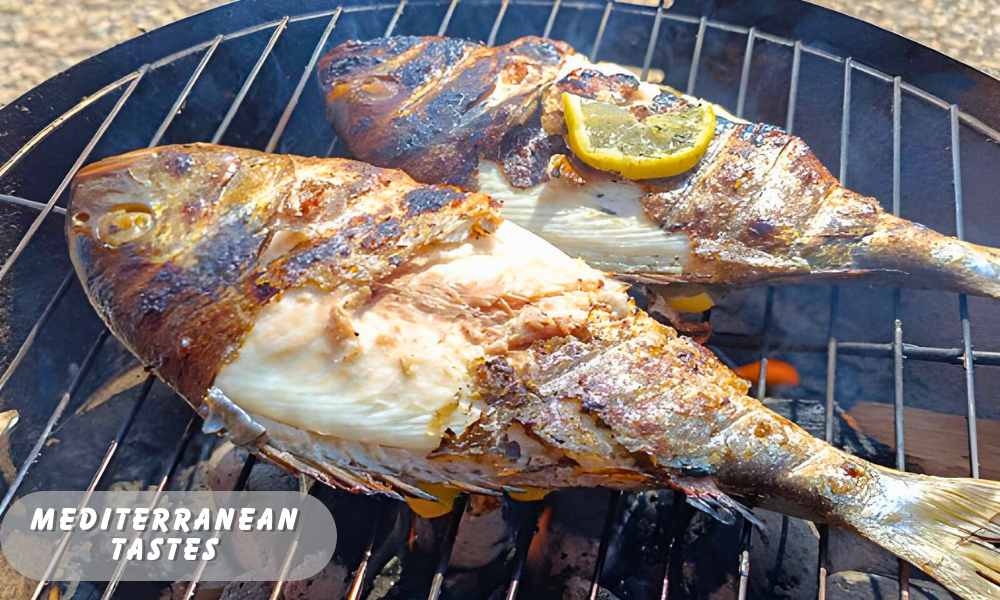
Mastering the Grill with Whole Orata
A whole sea bream, or orata, has an oval shape. Its narrow build feels ideal for the grill every time. It can be cooked to perfection in less than 20 minutes. If uncomfortable with grilling fish, don’t worry at all.
This is one of the easiest ways to cook it. The skin will keep it from falling apart fast. It also locks in flavorful juices as it cooks. So give it a try using these simple tips.
Easy Tips for Better Grilling Fish
- For success with grilling fish, remove it from the fridge. Do this 20 minutes before cooking to take the chill off. This allows it to cook evenly with less steam. That helps prevent sticking on the hot grate.
- For subtle added flavor and soft aromatics, stuff the cavity. Use herbs and lemon slices for a fresh lift.
- To keep the fish from sticking:
- First, pat the fish dry and brush lightly. Use olive oil while the grill stays thoroughly clean.
- It should be blazing hot before you place anything down.
- Also, avoid a flare-up from fat and oil drips. Never set it directly above hot coals when grilling.
- Keep the thickest part facing the hotter zone instead.
- I often throw a few sprigs of rosemary below. They create wonderful aromatic smoke around the fish.
- To turn it, use a metal spatula cautiously. Delicately lift and roll toward the other side. Avoid scooping, because that can rip the skin off. Having 2 spatulas is helpful for smoother handling. Roll it onto the second one, and then easily reposition it. If it sticks while trying, wait calmly for a bit.
- Give it 2 more minutes for a better chance. It may release by itself as the moisture fades away. The surface dries out further and becomes nicely crispy.
- Then cook about 8-10 minutes on each side. Timing changes depending on size and grill strength. A food thermometer should read 145°F or 63°C. By then, the outside looks blistered and deeply charred. That is the finish, I trust from experience.
Smart Picks for Grilling Gear
- For clean fish handling, I always keep tongs nearby. A long grilling spatula helps me lift delicate sea bream safely.
- After years of home grilling, this habit really helps. A trusted spatula set makes turning and serving much easier.
- I also rely on a food thermometer for better timing. There is no more guessing when the fish cooks evenly.
Quick Tools and Sources Table
| Tool / Source | Why It Helps |
| Long grilling spatula | Lifts soft fish without breaking the skin |
| Tongs | It gives a better grip while moving the fish |
| Spatula set | Useful for turning, lifting, and serving |
| Food thermometer | Checks doneness fast with accuracy |
| Fish market source | Bring fresher sea bream for better grilling |
| Trusted kitchen setup | Makes daily grilling easier and cleaner |
Easy Ways to Serve and Enjoy Whole Grilled Sea Bream
When it is just the two of us, I debone carefully. In the kitchen, I serve the fillets nicely on a plate. For family eating outside, the table feels warm and lively. A full group of diners at the house loves grilled fish. I take it straight from the grill to everyone’s plates. In that case, it really helps to know how to eat.
A whole fish looks beautiful and generous at serving time. Either way, the process stays similar for most home cooks. I learned this from detailed, step-by-step instructions years ago.
They showed how to fillet a cooked fish without waste. You can check that style in a trusted recipe. I first practiced with roasted branzino before grilling sea bream.
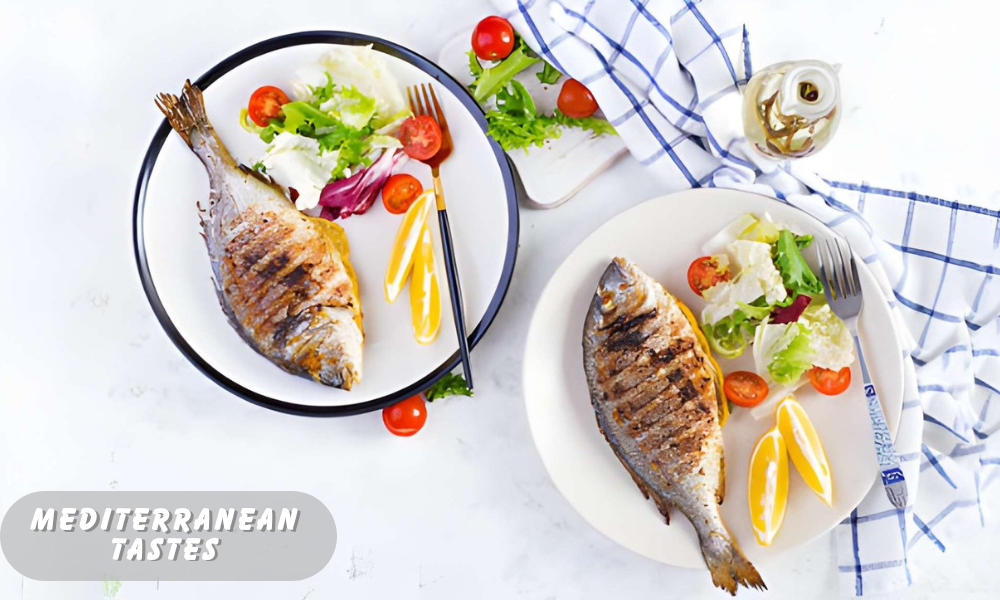
Favorite Side Ideas for Grilled Sea Bream
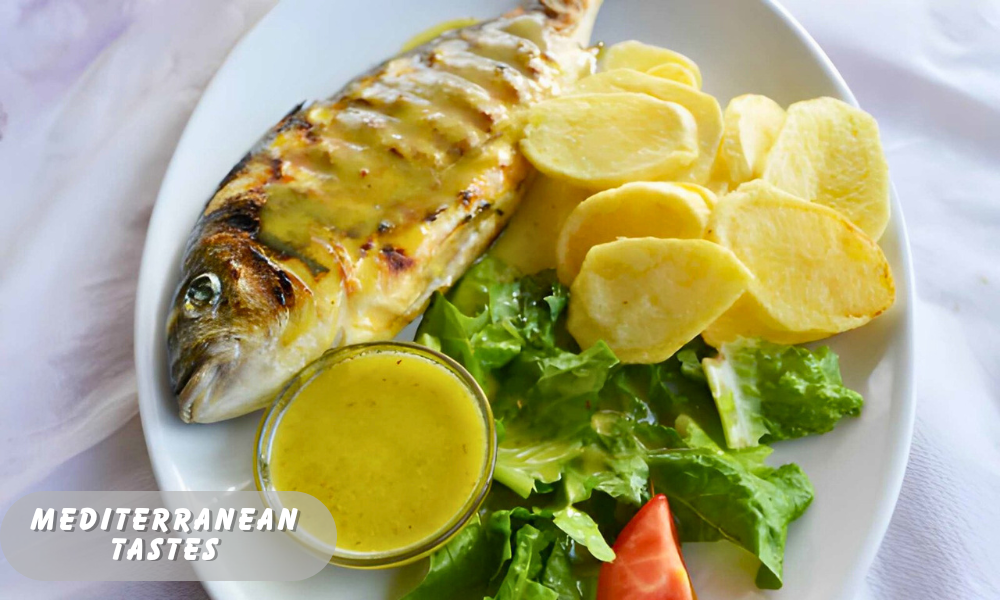
I like to serve grilled sea bream with simple sides. Basmati rice and roasted Mediterranean potatoes always work very well. For a brighter flavor, add caramelized fennel beside the fish.
A refreshing citron salad also keeps the plate light. I take full advantage of the hot grill outdoors. I cook extra vegetables there while the fish rests.
One easy favorite in my kitchen is grilled radicchio. Its bittersweet flavor feels bold yet very appealing. Keep it simply seasoned with olive oil and salt. That balance lets the fish and sides shine naturally.
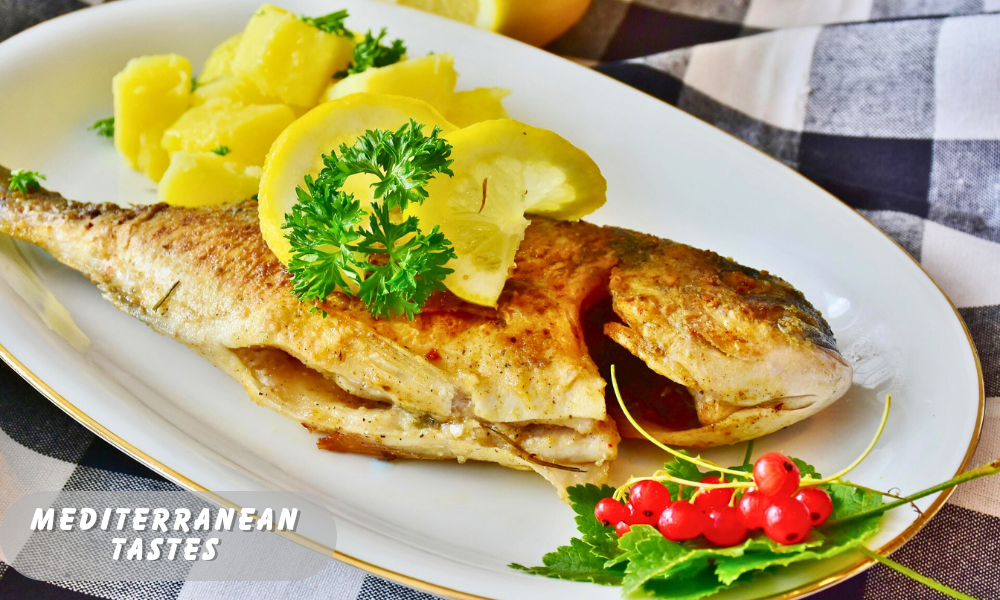
Bright Sauces for Grilled Sea Bream
At my house, I often keep sauce options basic. For many diners, that balance works best at the table. A quick and easy finish can change the mood. I usually whisk Salmoriglio Lemon & Olive Oil Sauce right before serving it.
Guests can spoon it gently over the fish themselves. That simple lemony sauce stays a clear favorite with seafood. Still, Grilled Sea Bream is already deeply flavorful and succulent. Sometimes only a drizzle of good peppery olive oil is needed.
I also add a squirt of lemon juice before serving. That lifts the lovely smoky flavor from the grill beautifully.
Recipe
Makes: 2 servings
Ingredients
- I always choose 2 whole sea bream, with each fish around 1 lb. If needed, 450 g works just as well for me. Ask for them gutted and cleaned, but keep the scales on.
- For a clean flavor, I keep it simple with salt and 4 sprigs. The aroma of fresh rosemary makes the fish smell amazing.
- I also add 1 lemon for brightness and balance.
- A drizzle of 1 Tbsp extra virgin olive oil finishes everything neatly.
Makes: 4 servings
Ingredients
- I start with 4 whole sea bream, keeping each fish around 1 lb. If you shop by metric, 450 g per fish works well. I prefer them gutted and cleaned, but with scales on.
- Then I add salt, 8 sprigs, and fragrant fresh rosemary.
- For balance, I squeeze 2 lemons over the surface.
- Then I brush 2 Tbsps of extra virgin olive oil evenly.
Makes: 6 servings
Ingredients
- I bought 6 whole sea bream, with each fish around 1 lb. For metric shopping, 450 g per fish feels just right. I ask for them gutted and cleaned, still with scales on.
- Then I season with salt, 12 sprigs, and fresh rosemary.
- For balance, I squeeze 3 lemons over the surface.
- Then I brush 3 Tbsps of extra virgin olive oil evenly.
Step-by-Step Grill Method
- First, remove the fish from the fridge 20 minutes early. This before–cooking rest helps take off the chill nicely. That pause allows the fish to cook more evenly. It also helps prevent sticking on the grill surface.
- Now, heat the grill:
- For a gas grill, aim for 400°F or 200°C.
- With a charcoal grill, wait about 20-25 minutes first. The hot coals should look covered with gray ash.
- Meanwhile, prepare the fish with calm, clean steps. Rinse it well, then pat dry very gently. Season with salt inside and out for balance. Then stuff the cavity with a handful of rosemary.
- Add 2 slices of lemon for bright flavor. Then brush the entire fish with olive oil.
- Now place it on the hot grill carefully. Always avoid direct flame and sudden flare-ups. Never set it directly above the hottest coals.
- Cook about 8 to 10 minutes, depending on size.
- Timing also changes with the amount of heat below. Then flip the fish using a metal spatula. Delicately lift and roll it to the other side. Avoid scooping, or you may rip the skin off. A second spatula is helpful when turning it over. You can guide it into place and easily reposition it.
- If needed, wait a few more minutes before trying again. The skin will dry out further and naturally loosen. Then it may release itself when truly ready. I trust this step whenever the grill feels stubborn.
- Cook again until it reaches 145°F or 63°C. Check the thickest part for the best reading. It also flakes away from the center spine easily. The outside should look blistered and charred.
- To serve, transfer it to a serving dish. Then garnish with sprigs of rosemary or parsley. Add wedges of lemon and extra virgin olive oil. Let guests drizzle it at the table themselves.

")


 with this easy Mediterranean recipe. Crispy skin, tender fish, and fresh herbs for perfect flavor.)